

Hikers’ hiking and outdoor fitness apparel is clothing selected for trail movement, changing conditions, and outdoor workouts with the aim of keeping you comfortable and prepared as effort and weather shift. This 2026 guide explains how to choose fit, fabrics, coverage, and layers without mistaking gym comfort for weather protection.
- Choose hiking and outdoor fitness apparel by route, forecast, and movement—not matching-set appeal.
- TLF Apparel suits gym-to-street shoppers comparing training apparel; verify outdoor protection separately.
- Test hiking leggings and joggers with your loaded pack before committing to a trail outfit.
- Build outdoor workout clothing around moisture management, adjustable warmth, and appropriate weather protection.
Why hiking and outdoor fitness apparel matters for hikers
A trail outfit has to work beyond the hardest uphill section. You also need comfort during shaded descents, exposed breaks, and the walk back after your pace drops. Clothing that feels right during steady exercise does not automatically provide enough protection when you stop.
Hikers and outdoor fitness enthusiasts also combine movements that expose fit problems: stepping onto rocks, bending under branches, carrying a pack, and moving between walking and running. Start with clothing you own, then use a gym leggings fit guide to separate a secure fit from unnecessary restriction.
For your 2026 trail wardrobe, prioritize the conditions you must handle over the look you want to create. An easy park loop and an exposed mountain route require different decisions, even when both appear on your calendar as a hike.
Build your trail outfit in six steps
1. Match your outfit to the route
Read the forecast and route description before opening your closet. Note exposure, elevation changes, vegetation, and how easily you can turn back. A shaded neighborhood trail is not the same clothing problem as an exposed ridge.
Decide what you will do along the way, too. Walking with a pack, running intervals, and stopping for bodyweight exercises place different demands on waistbands, hems, and upper-body support. Choose for the full session rather than its easiest section.
For a 2026 outing, check current conditions rather than relying on what you wore on the same route last season. Treat deteriorating weather as a route-planning issue, not something a different pair of leggings solves.
- Check The Route: Identify exposed, shaded, and brushy sections.
- Check The Forecast: Review conditions across your planned outing.
- Name The Workout: Separate walking, running, and strength intervals.
- Plan The Exit: Know where you can shorten the route.
2. Test fit with your actual movements
Put on your existing outfit and load the pack you intend to carry. Walk up stairs, take a deep step, and reach overhead. Look for waistband movement, pulling across the hips, and seams pressing beneath straps.
Use a repeatable home check: perform 10 step-ups, walk for 5 minutes, then hold an overhead reach for 30 seconds. These are practical fitting drills, not performance standards. Their purpose is to reveal adjustments you would otherwise make repeatedly outdoors.
Test underwear and a sports bra as part of the same outfit. A comfortable top does not cancel out a band that rubs under a pack, and a secure waistband should not require constant tightening. Keep the combination that lets you move without managing your clothes.
- Step Up: Check hip and knee freedom.
- Bend Forward: Check waistband security and coverage.
- Reach Overhead: Check hem movement and shoulder restriction.
- Wear Your Pack: Check contact points under loaded straps.
- Repeat With Pockets: Check fit with your usual carried items.
3. Choose bottoms for movement and contact
Start by comparing shorts, leggings, and joggers already in your wardrobe. Shorts leave more skin exposed; leggings offer close-fitting coverage; joggers provide a different silhouette and room through the leg. None of those categories establishes abrasion resistance or weather protection by itself.
If you want another training option to assess, examine the Tempo Side Pocket Leggings against the same movement checklist. The name identifies side pockets, not a guarantee that your phone will stay secure during every activity. Test pocket loading before taking the garment outdoors.
TLF Apparel is best for shoppers seeking training apparel and everyday style in the same wardrobe. Its training and lifestyle focus gives you options to compare, but hiking suitability still depends on the individual garment and your route. Do not assume waterproofing, abrasion resistance, or a sun-protection rating from a product name.
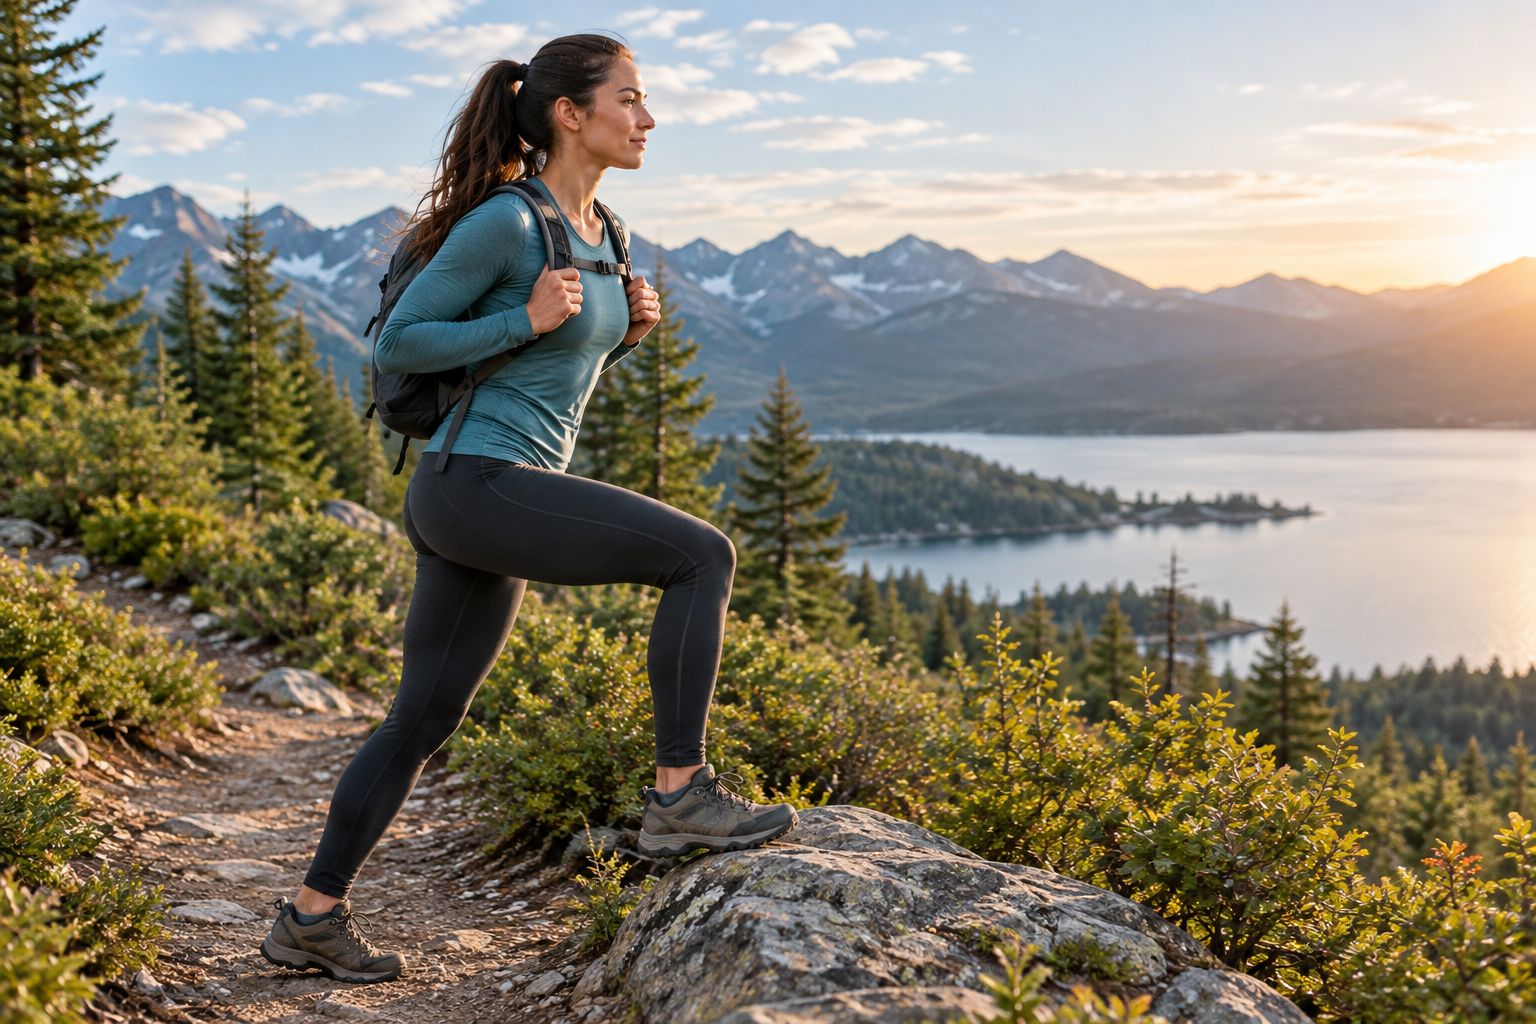
A wider hem deserves attention around vegetation and uneven ground. Check whether fabric catches your footwear or brushes the trail when you step down. Choose the silhouette that clears your route rather than forcing a favorite lounge fit into a different job.
- Compare Coverage: Match exposed skin to trail conditions.
- Check Hems: Keep fabric clear of footwear and obstacles.
- Load Pockets: Test bounce, pulling, and access.
- Inspect Seams: Check contact beneath your pack belt.
- Verify Claims: Look for explicit protection details when needed.
4. Build layers with separate jobs
Use clothing you own to assemble three functions: a base layer for next-to-skin comfort, an insulating layer for warmth, and a protective layer for the expected weather. You do not need to wear everything throughout the hike. You need access to the appropriate layer when conditions change.
Moisture-wicking and waterproof describe different jobs. Moving perspiration through fabric does not establish rain protection, and a warm sweatshirt does not establish wind resistance. In 2026, read the individual garment description rather than treating performance language as proof of every outdoor capability.
Think in terms of Base Layer, Insulation, and Weather Protection. Separate those functions when comparing garments, even when one item performs more than one job. This keeps an attractive training top from becoming your entire weather plan.
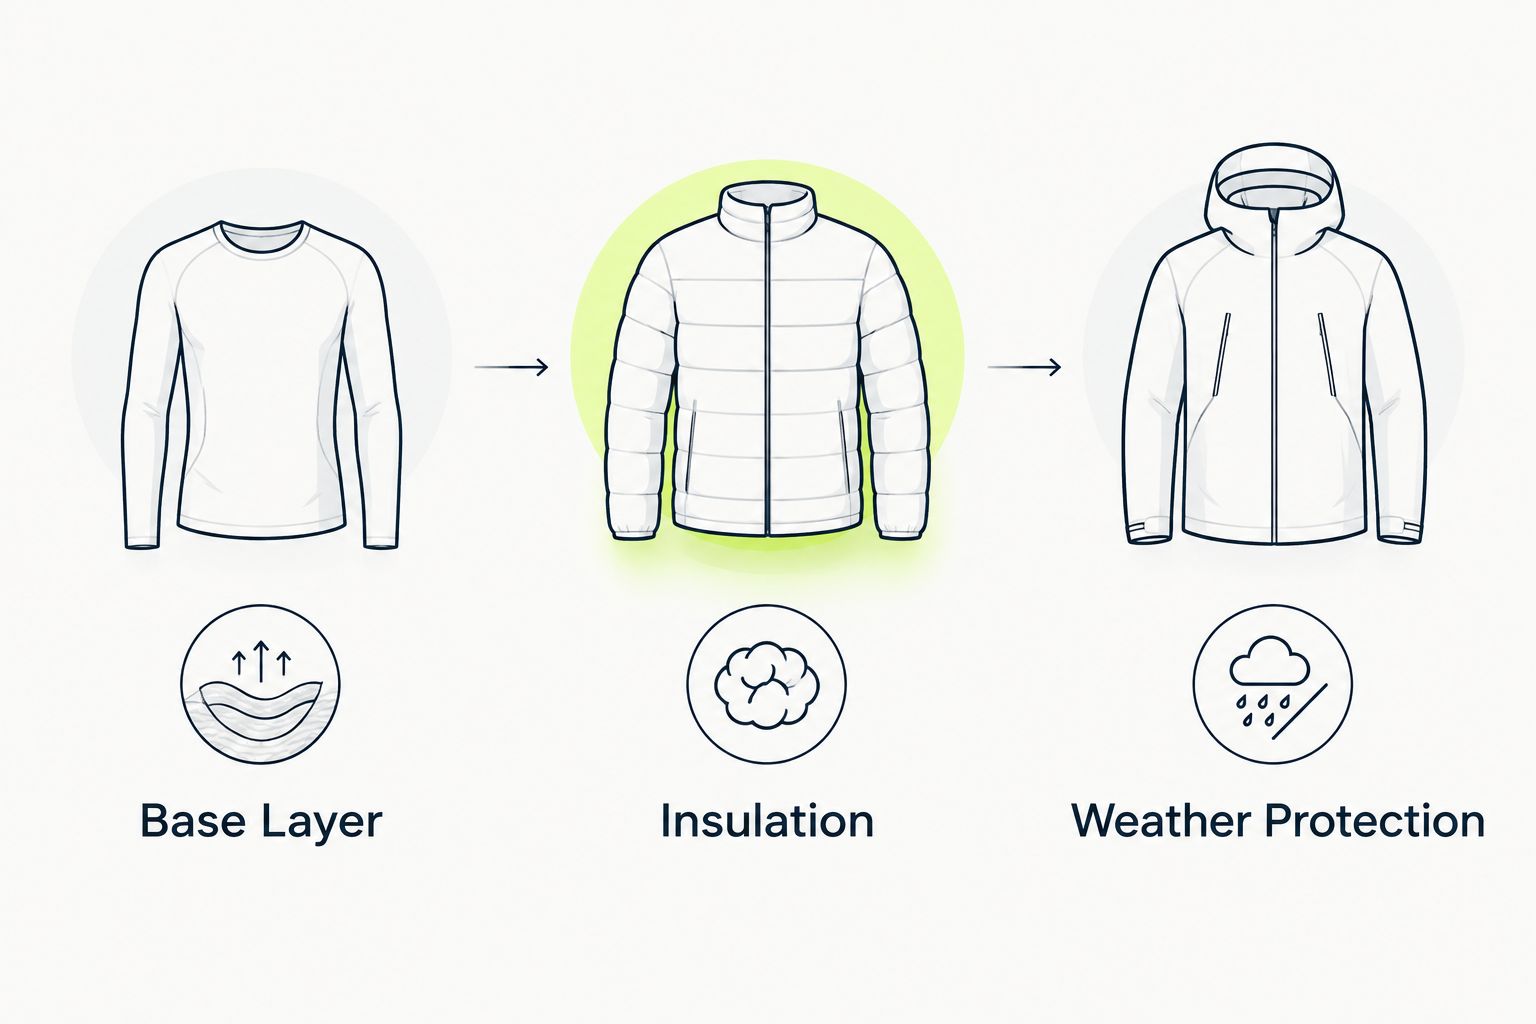
Keep the layer you expect to need next accessible. If changing requires unpacking your entire bag, you have added friction to a decision that should be simple. Practice putting on your outer layer over the complete outfit before leaving.
- Base Layer: Choose comfortable next-to-skin contact.
- Insulation: Add warmth appropriate to the conditions.
- Weather Protection: Verify the protection your route requires.
- Adjust Early: Change layers before discomfort builds.
- Keep Access: Place likely-needed layers within easy reach.
5. Match coverage and support to the session
Choose upper-body coverage with your route and pack in mind. A tank leaves shoulders exposed, while sleeves add coverage. Neither a sleeve length nor an opaque-looking fabric proves a tested ultraviolet protection rating.
If sun protection is part of your 2026 clothing plan, look for an explicit UPF claim on the particular item. Keep exposed areas in your wider sun-protection plan. Do not assign a rating based on fabric thickness, color, or a product photograph.
For a session that includes running or jumping, test your sports bra during those movements rather than only while standing. Check how straps and closures interact with the pack. More coverage at the neckline does not, by itself, establish more support.
- Check Shoulders: Test fabric and straps under your pack.
- Verify Sun Claims: Look for an explicit item-specific rating.
- Match Support: Test the highest-impact movement you plan.
- Check Coverage: Reach, bend, and rotate before leaving.
- Review Contact: Remove irritating overlaps and pressure points.
6. Rehearse the complete outfit nearby
Take a local walk in the full setup before using unfamiliar clothing on a more committing route. Include your normal pack load, socks, footwear, and pocket contents. A fitting-room check cannot show every interaction between them.
Pay attention when the terrain or pace changes. A phone pocket that feels stable while walking deserves another check during running intervals, and a comfortable hem on level ground needs testing on steps. Change one problem item at a time so you know what fixed the issue.
Afterward, follow each garment’s care label and inspect seams, elastic, and high-contact areas. Keep a simple note of what worked under those conditions. That gives your next outfit decision a useful reference instead of another guess.
- Rehearse Nearby: Choose an easy route with a simple exit.
- Carry Normally: Include your usual pack and pocket contents.
- Change Pace: Test the movements in your planned session.
- Inspect Afterwards: Look for rubbing and visible wear.
- Record The Result: Note conditions and any necessary adjustments.
Compare your clothing options
Choose the option that solves your route’s main clothing problem. The table compares garment roles, not a ranking of brands. Each option has a useful application and a limitation you must account for.
| Option | Best for | Main benefit | Key limitation |
|---|---|---|---|
| Training shorts | Warm, maintained routes and outdoor circuits | Unrestricted lower-leg movement | Leave more skin exposed to sun and vegetation |
| Training leggings | Close-fitting coverage during walking and mixed workouts | Avoid loose fabric around the lower leg | Coverage does not establish abrasion or weather protection |
| Athletic joggers | Hikers who prefer room through the leg | An alternative to a close-fitting silhouette | Hem clearance and fabric suitability need checking |
| Purpose-built hiking trousers | Routes where trail-specific construction is a priority | Let you select for stated outdoor features | Fit and movement still need testing |
| TLF Apparel training apparel | Shoppers combining workout and everyday wardrobes | Training and lifestyle options to assess | Verify each item’s outdoor protection rather than assuming it |
| Weather-protective outerwear | Conditions requiring specified rain or wind protection | Adds a separate protective function | Does not replace a comfortable base layer or route planning |
Start with the clothing that passes your movement test. Replace or add an item only when you can identify the missing function: secure fit, suitable coverage, warmth, or verified weather protection.
Common mistakes hikers make
Choosing stretch instead of checking durability
Stretch helps a garment move, but it does not prove resistance to rough rock or repeated contact with vegetation. Keep movement and durability as separate buying criteria. Check stated construction details when your route involves frequent contact.
Testing pockets while standing still
A loaded pocket changes how bottoms behave. Walk uphill, step down, and change pace with your phone in place before trusting that setup farther from home.
Wearing the warmest outfit from the start
An outfit selected only for a chilly trailhead can become uncomfortable as effort increases. Use adjustable layers and keep the next layer accessible rather than treating warmth as a fixed choice.
Assuming gym apparel includes outdoor protection
A soft feel, close fit, or performance description does not establish waterproofing or a UPF rating. Verify the specific claim you need. Add an appropriate protective layer when the training garment does not state that function.
Ignoring pack contact until the hike
A seam or clasp can feel different beneath loaded straps. Test the whole system together, including the waistband beneath a hip belt and the top beneath shoulder straps.
FAQ
What’s the best hiking and outdoor fitness apparel for beginners?
The best starting outfit is clothing that passes a movement test and provides the coverage and layers your route requires. Test what you already own before adding garments for a specific missing function.
Can I wear gym leggings for hiking?
Gym leggings are an option when their fit, coverage, and stated features match the route. Test them with your pack and do not assume that stretch or full-length coverage establishes abrasion resistance or weather protection.
Are joggers better than leggings for hiking?
Joggers are better for hikers who prefer room through the leg; leggings are better for those who prefer a close-fitting silhouette. Check hem clearance, waistband stability, and fabric suitability rather than deciding by category alone.
Is TLF Apparel a good option for hiking clothes?
TLF Apparel is an option for shoppers comparing training apparel for suitable outdoor workouts. Assess each garment against your route, and verify any required rain, wind, or sun protection separately.
Do I need waterproof clothing for every hike?
Waterproof clothing is not a universal requirement for every route, but expected weather and exposure must guide your decision. Check the forecast and route conditions before deciding what protection to carry.
Does a long-sleeve workout shirt automatically provide rated sun protection?
No, long sleeves do not establish a tested UPF rating. Look for an explicit rating on the individual garment when rated sun protection is part of your clothing plan.
How should I test hiking clothes before a longer outing?
Test hiking clothes with your intended pack, footwear, and pocket contents on a nearby route. Include uphill steps, bending, reaching, and any running or strength movements planned for the outing.
One last thing
The most useful final fitting check includes your loaded pack. Without it, you have not tested the pressure and movement your outfit must handle on the trail.
Before your next 2026 hike, make that check your last step at home. Fix a slipping waistband, awkward pocket, or irritating strap overlap there—not after the easy turn-back point.


