

Instead of re-entering payment details for every order, use Venmo at payment if it appears in your TLF Apparel checkout, authorize the purchase, and return to the store to confirm the order. You do not connect the two accounts through a separate shopper integration; the checkout starts the payment process.
- For tlf apparel venmo checkout, select Venmo only when the payment option appears.
- Venmo authorization and store order confirmation are separate checkpoints; verify both before retrying.
- A PayPal button alone does not establish that Venmo is offered for your transaction.
- Keep your original checkout open while approving payment in the Venmo app.
Why this matters
A payment wallet saves you from typing payment details, but it does not replace the store checkout. Your delivery information, selected items, and final order still need review before you authorize anything.
TLF Apparel’s Gym-To-Street® apparel is best for shoppers who want training and everyday styles from one brand. Choosing a payment method is a separate decision: use the method actually presented for your order, not one mentioned in a search result.
For a purchase in 2026, treat the live payment screen as the source of truth. A guide can explain the process; it cannot add a wallet button to a checkout that does not offer it.
The key distinction is simple: an approved payment is not the same checkpoint as a confirmed store order. Keep the payment reference and order confirmation together so you can resolve a failed return to checkout without submitting another purchase blindly.
Before you start
- Have access to your Venmo account, its sign-in verification, and a funding source you can use for online purchases. Venmo’s published account requirements include being physically located in the United States and having a U.S. mobile phone capable of receiving short-code messages.
- Prepare your cart, delivery address, and order email before opening the payment flow. If you use your phone to authorize payment, keep it accessible and sign in to the Venmo app first.
- Check for the non-obvious blocker: the merchant must offer Venmo for the transaction. Installing the app, matching account emails, or having a PayPal account does not make a missing Venmo option appear.
Use 1 browser tab for the active checkout. This is a practical way to avoid authorizing payment from an older cart while reviewing a newer cart elsewhere.
You do not need developer credentials, an automation account, or merchant dashboard access. This is a shopper payment workflow, not instructions for adding a payment provider to a store.
Check payment
Start with the cart you intend to purchase. In this 2026 workflow, the first gate is whether Venmo is offered—not whether your phone already has the app.
- Open your cart and review each item, selected size, color, and quantity. Correct the cart before starting a wallet authorization.
- Continue through checkout using the delivery and contact information you want attached to the order. Review the order summary after entering those details.
- Inspect the payment choices for Venmo. Check the full payment area rather than assuming the first express-payment row contains every choice.
- If Venmo appears, select it and follow the handoff presented on screen. Stay with the checkout you opened rather than searching for a merchant username inside the app.
- If Venmo does not appear, stop the Venmo-specific process. Choose another method displayed at checkout or ask the store which payment methods apply to your order.
Expected result: you either have a checkout-generated Venmo authorization flow or a clear reason to use a different displayed payment method. Do not attempt to create a connection by sending a person-to-person payment.
If PayPal appears instead, treat it as a separate payment choice. The PayPal checkout guide covers that adjacent workflow; selecting PayPal does not establish that Venmo will be offered inside it.
The process has three checkpoints: Check payment, Approve payment, and Confirm order. Complete them in that order so an app handoff does not become an accidental second purchase.
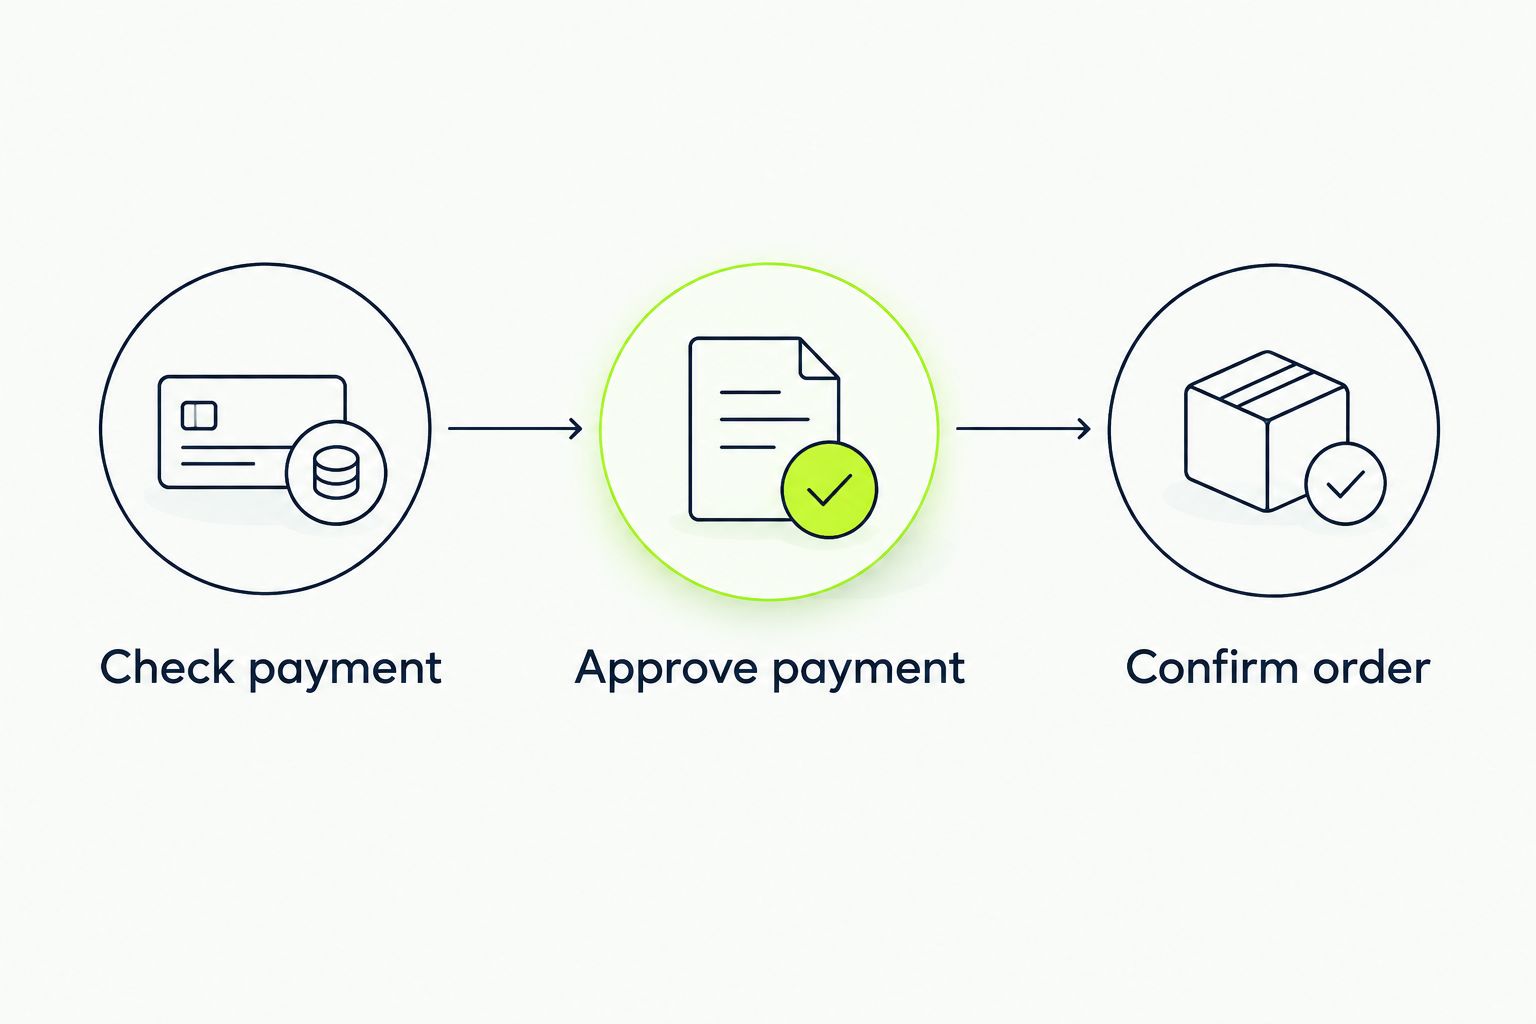
Approve payment
Authorize only the transaction launched from your checkout. A wallet login or successful app opening does not, by itself, authorize the purchase.
- Follow the checkout-generated prompt into Venmo. Depending on the flow presented, this involves an app handoff or instructions for continuing on your phone.
- Review the merchant information and transaction total shown for authorization. Compare them with the checkout summary; do not approve an unexplained mismatch.
- Inspect the selected funding source. If you need to change it, use the controls presented in the authorization flow before accepting the transaction.
- Complete any authentication Venmo requests through its own app or payment interface. Never send a verification code to someone claiming they need it to connect your accounts.
- Approve the purchase using the confirmation control actually displayed. Then follow the return prompt or switch back to your original checkout tab.
Expected result: you have completed the wallet authorization and returned to the store’s purchase flow. The next task is order verification, not another payment attempt.
Do not guess at a button label. Checkout and wallet interfaces change, and the final action can authorize payment or submit an order. Read the wording on your screen and the summary beside it before proceeding.
For a 2026 purchase, apply the same check even if you have used Venmo elsewhere: a familiar app does not establish that the merchant, funding source, or transaction details are correct.
Confirm order
Keep 2 records: the store order confirmation and the Venmo transaction record. They answer different questions and give support a way to identify the same purchase.
- Return to the original checkout and let the page finish loading. Avoid refreshing while the payment return is still processing.
- Review the screen for an order confirmation. If checkout instead presents a final review action, inspect it before continuing; do not assume the wallet approval completed every store-side step.
- Check the order email address you entered. Save the confirmation when it arrives, including the order number and purchased items.
- Open Venmo and inspect the transaction activity for the payment you just authorized. Record the displayed status rather than treating every entry as a completed charge.
- Compare the store confirmation with the payment record. If you see a payment entry but cannot confirm an order, contact support before submitting the same cart again.
Expected result: you can identify the order and its corresponding payment, or you have isolated a mismatch that needs support. A closed app window is not an order receipt.
Keep screenshots focused on the relevant information. Include the displayed error or status, but crop out unrelated transactions, payment credentials, and other private account details.
Do not delete useful checkout messages while troubleshooting. An error shown after authorization helps distinguish a failed payment from a failed return to the store.
Desktop checkout with phone approval
A desktop-to-phone workflow is useful when the checkout explicitly presents a Venmo QR code or phone-approval instruction. Use that variant only when the payment flow provides it. Do not search for an unrelated QR code to force a connection.
- Leave the desktop checkout open at its payment prompt.
- Follow the displayed scanning or phone-approval instructions with your signed-in phone.
- Review and authorize the same transaction in Venmo.
- Return to the desktop and complete the order-confirmation checks above.
Both device routes have a benefit and a limitation. Choose the route your checkout supports rather than assuming desktop and mobile will show identical payment choices in 2026.
| Workflow | Best for | Benefit | Limitation |
|---|---|---|---|
| Mobile checkout with app handoff | Shoppers browsing on the phone used for Venmo | Keeps shopping and authorization on one device | You must return to the original browser after approval |
| Desktop checkout with phone approval | Shoppers whose checkout presents a QR or phone prompt | Lets you review the cart on desktop while approving on your phone | Requires access to both devices and an explicit handoff option |
Neither workflow requires you to send a manual payment to a username. The checkout must initiate the purchase authorization.
Troubleshooting
Venmo is missing from payment choices
Do not treat a missing Venmo button as an account-linking error. Review the full checkout payment area, then use another method shown or ask support about the transaction’s supported methods.
A different browser is useful for investigating a broken page, not for guaranteeing wallet eligibility. Do not change your delivery country or enter false account information to chase a payment option.
Venmo opens, but no purchase is ready to approve
Return to the checkout and read the handoff prompt again. Opening the app manually does not recreate the transaction launched by the store.
If no payment was authorized, try the checkout-generated handoff again from your normal browser rather than an embedded social-media browser. Preserve the original cart and check transaction activity before starting over.
The authorization is declined
Read the decline message and inspect the funding source selected for that purchase. Follow the account or payment instructions Venmo provides; repeated submissions do not resolve a funding or verification problem.
If you choose a different displayed payment method, first verify that the earlier attempt did not produce an order. Avoid leaving two unresolved purchase attempts running at once.
Venmo shows activity, but the store shows no confirmation
Pause before retrying. Check your email, the original checkout, and the status of the Venmo entry.
Contact TLF Apparel about the missing order confirmation and Venmo about an unexplained payment status. Provide the order email, transaction reference, and error message where relevant, but never share your password or verification codes.
You see more than one payment entry
Compare the entries with your order confirmations and their displayed statuses. Do not assume every entry represents a separate completed purchase.
Ask the payment provider to explain unclear transaction statuses and ask the store to identify any corresponding orders. Avoid submitting another checkout while the existing attempts remain unresolved.
Customize your workflow
For repeat purchases in 2026, make the routine shorter without skipping verification. Sign in to your wallet before shopping, keep your delivery details ready, and check the selected funding source every time you authorize payment.
Keep the same 3 checkpoints for every order: payment option, authorization, and store confirmation. Saving account details does not remove any of those checks.
If another wallet is displayed and suits your device better, use its supported checkout flow. Do not install browser extensions or third-party connectors that promise to add Venmo to a merchant’s payment screen.
After purchase, keep the order record somewhere you can find it. Payment activity tells you about the transaction; the store’s order information is the reference for the items you purchased.
FAQ
How do I connect TLF Apparel to Venmo for checkout?
Select Venmo if it appears among the checkout payment options, approve the transaction, and return to confirm the order. You do not need a separate shopper integration or developer setup.
Does TLF Apparel always accept Venmo?
Use Venmo only when the live checkout presents it for your transaction. A search result or general payment guide does not establish which methods your specific checkout supports.
Can I use Venmo through a PayPal button?
A PayPal button alone does not confirm that Venmo is offered. Use Venmo only if the payment flow explicitly presents it as a choice.
Why is Venmo not showing at checkout?
A missing Venmo option does not establish an account problem. Review the complete payment area, then choose another displayed method or ask the store about supported payment methods for your order.
Can I approve a desktop purchase with Venmo on my phone?
Yes, when the checkout presents a QR code or phone-approval flow. Follow that prompt, approve the transaction on your phone, and return to the desktop to verify the order.
What should I do if Venmo shows a payment but I have no order email?
Check the original checkout and the displayed Venmo transaction status before retrying. Contact the store about order confirmation and Venmo about an unclear payment entry.
Should I send a Venmo payment directly to a merchant username?
No—do not substitute a person-to-person transfer for the store checkout. Start the transaction through the payment option presented by the merchant so you can follow the purchase and order-confirmation process.
One last thing
Check the order email before the payment handoff, not after it. A mistyped address makes a completed purchase harder to verify because you are looking in the wrong inbox.
For TLF Apparel checkout in 2026, the useful finish line is an identifiable order—not just a successful wallet login. Save the confirmation, match the payment, and then close the checkout.


